Create an AI translation project
This guide covers creating a project and running an AI translation. For a full walkthrough with screenshots, see Your first AI translation.
Prerequisites
- A Taia account (free plan is sufficient).
- A file you want to translate.
Steps
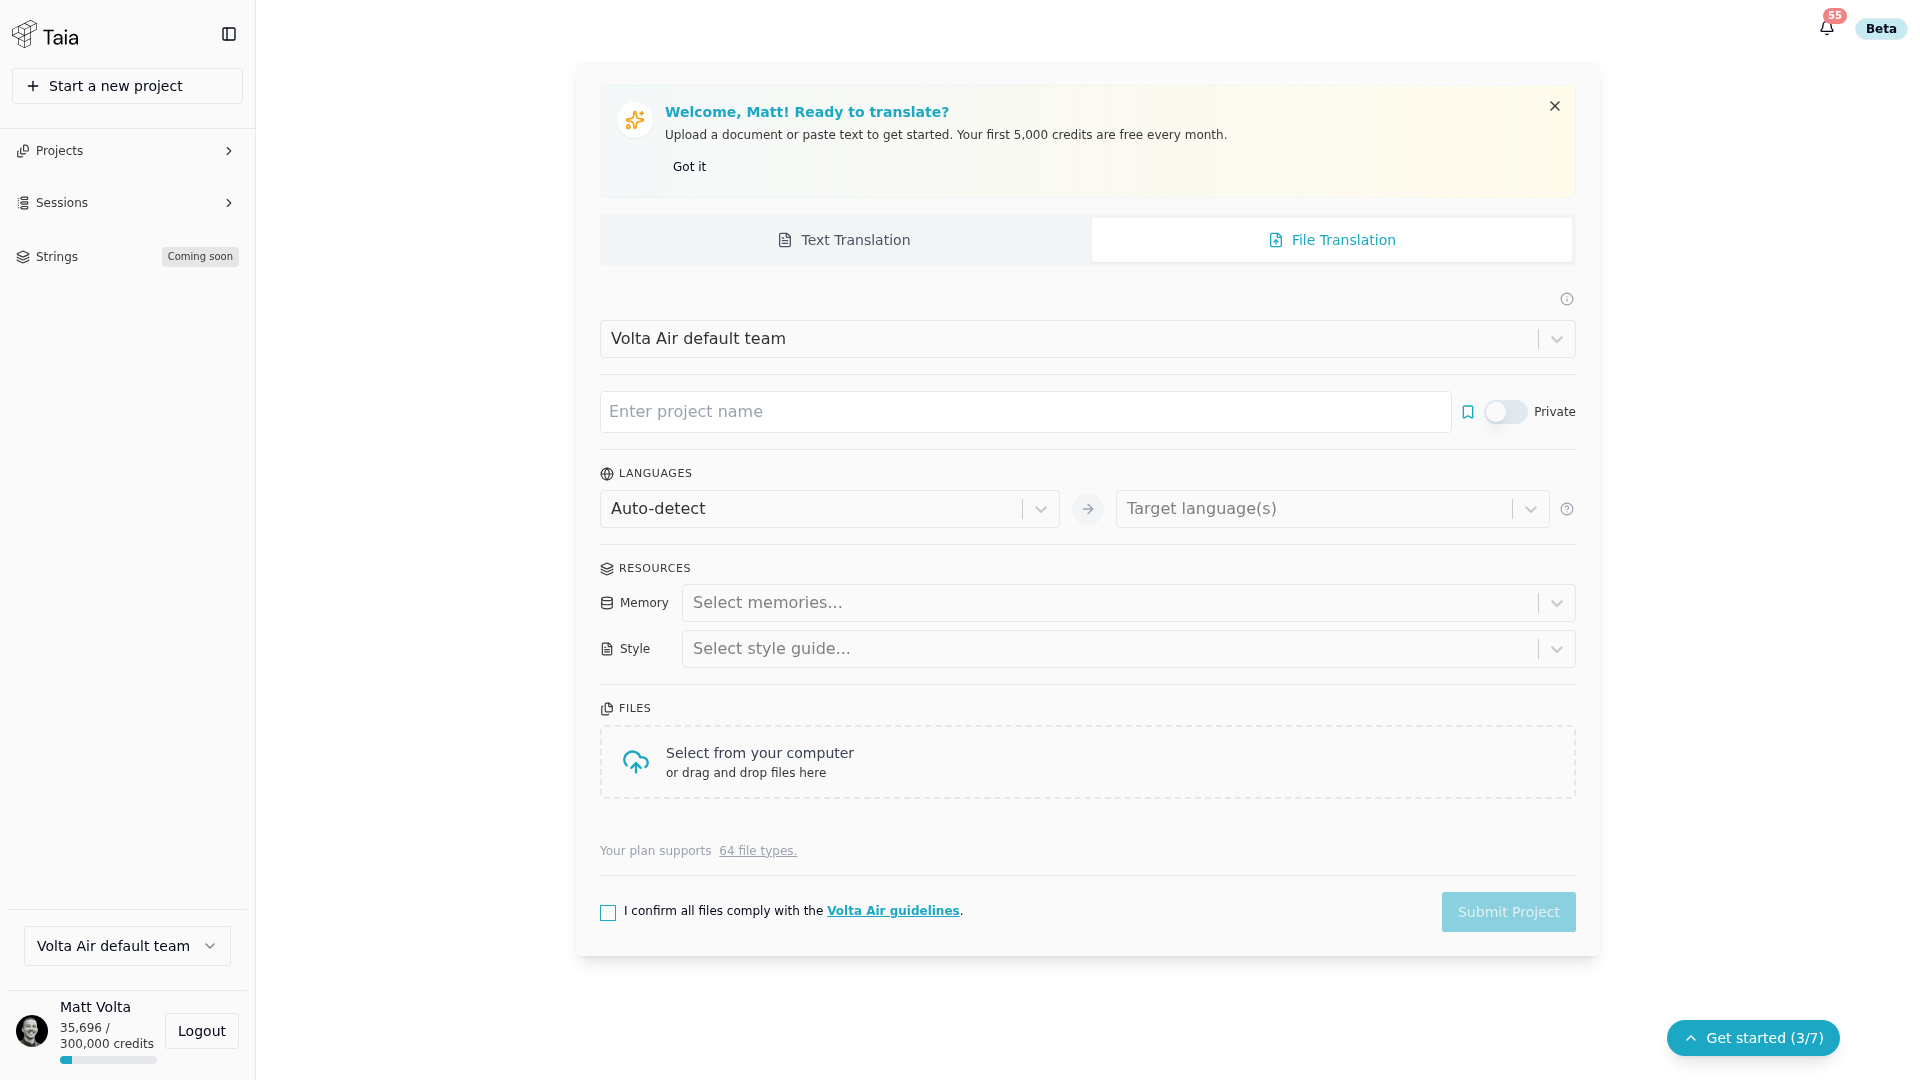
- Go to the Home page and make sure the File Translation tab is selected.
- Drag your file into the upload area or click to browse.
- Set the source language (or leave on Auto-detect).
- Select one or more target languages.
- Optionally attach a glossary, translation memory, or style guide (shown if your plan includes them).
- Enter a project name or use the auto-filled filename.
- Click Submit Project.
- On the project page, click Translate Instantly.
- Confirm the AI model and word cost, then click Confirm.
- Wait for translation to complete, then click Download.
Tips
- To reuse the same settings on a future project, click the bookmark icon next to the project name field on the Home page and save a project template. See Save project settings as a template.
- Free and Basic plans select from 50 languages; Pro and Enterprise select from 204. There's no fixed file-count limit per project — only a 100 MB total upload size.