Create a glossary
A glossary tells Taia's AI engine which terms must always be translated a specific way. This is how you enforce brand names, product names, legal terms, and "do not translate" entries across every project.
Prerequisites
Your plan must include the glossary feature (Pro and Enterprise plans).
Steps
- In the sidebar, click Glossaries.
- Click Create Glossary.
- Enter a name for the glossary (for example, "Brand Terms EN→DE").
- Select the source language and one or more target languages.
- Click Create.
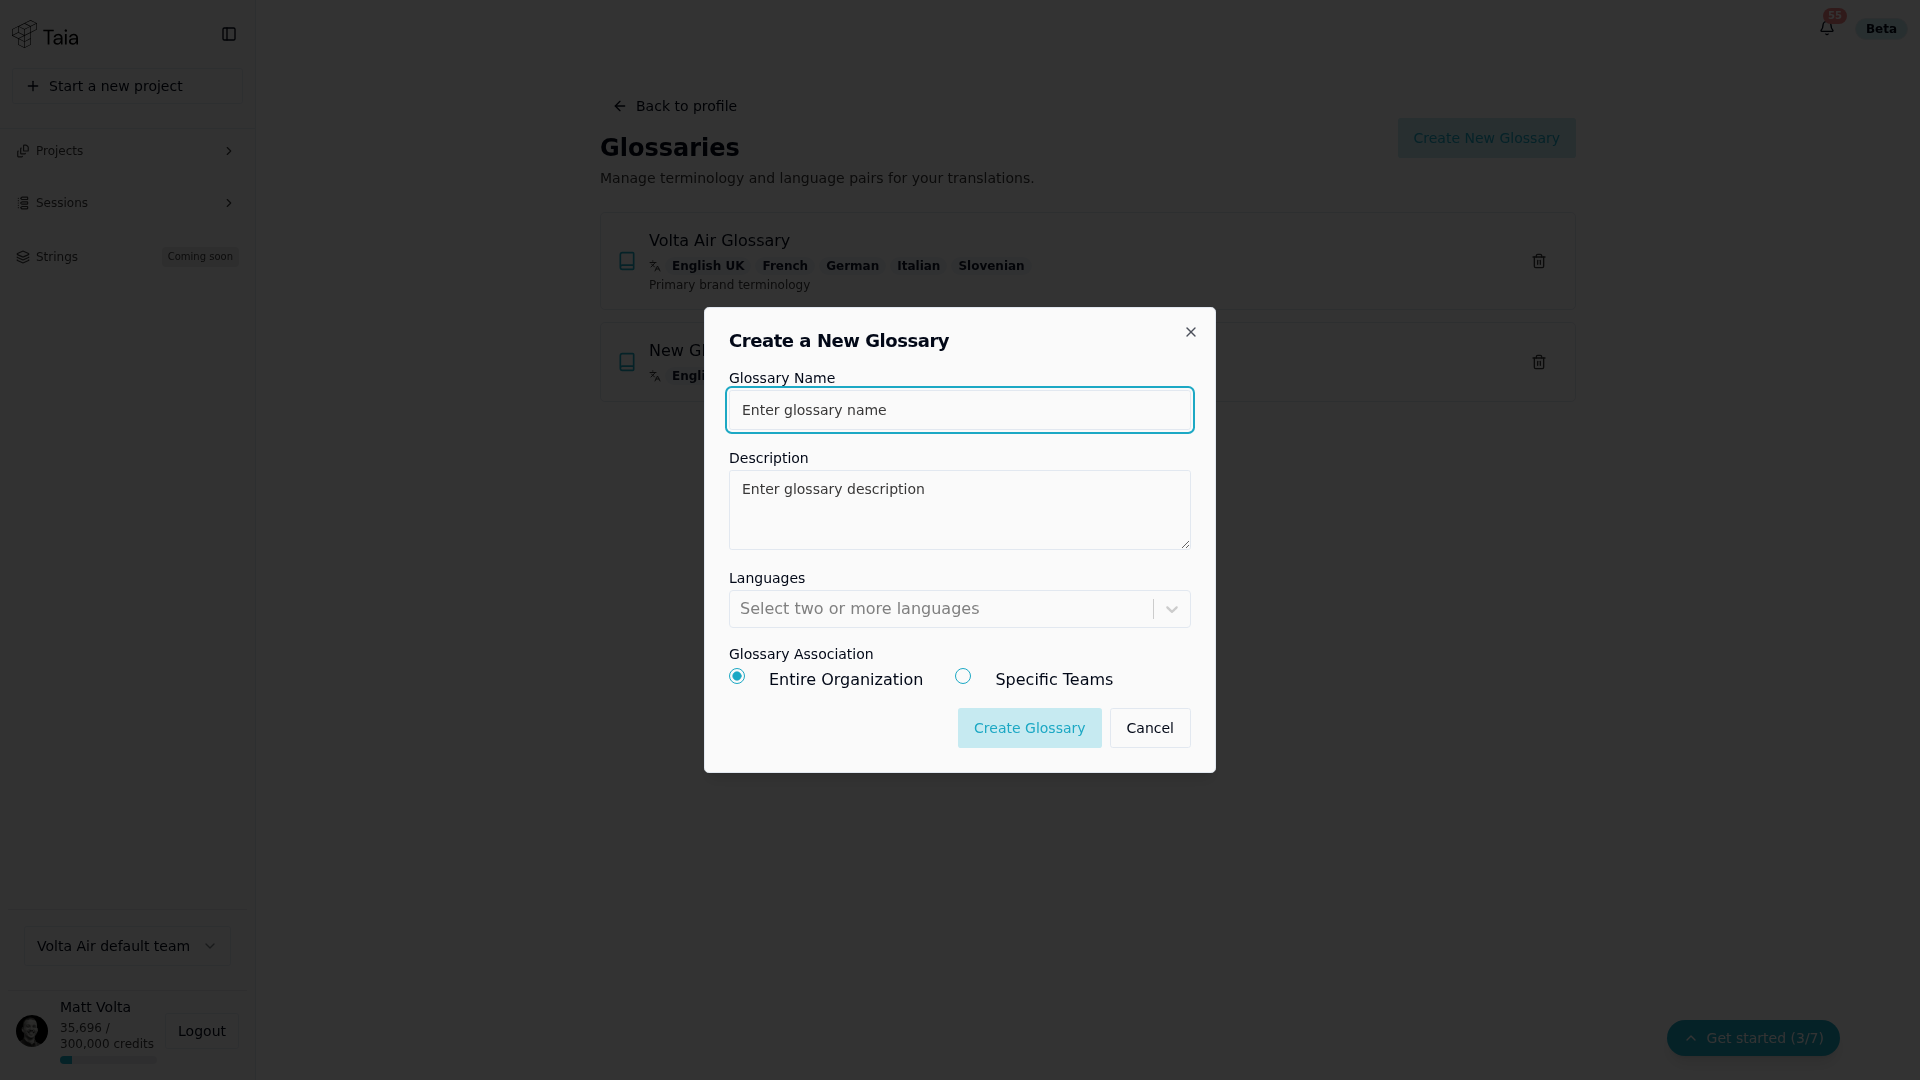
You're taken to the glossary detail page. It's empty for now.
- To add a term, click Add Term — this adds a blank, editable row at the end of the table. Enter the source term and its translation(s) directly in the row, then click outside it (or press Tab past the last field) to save. There's no separate Save button; the row saves automatically on blur.
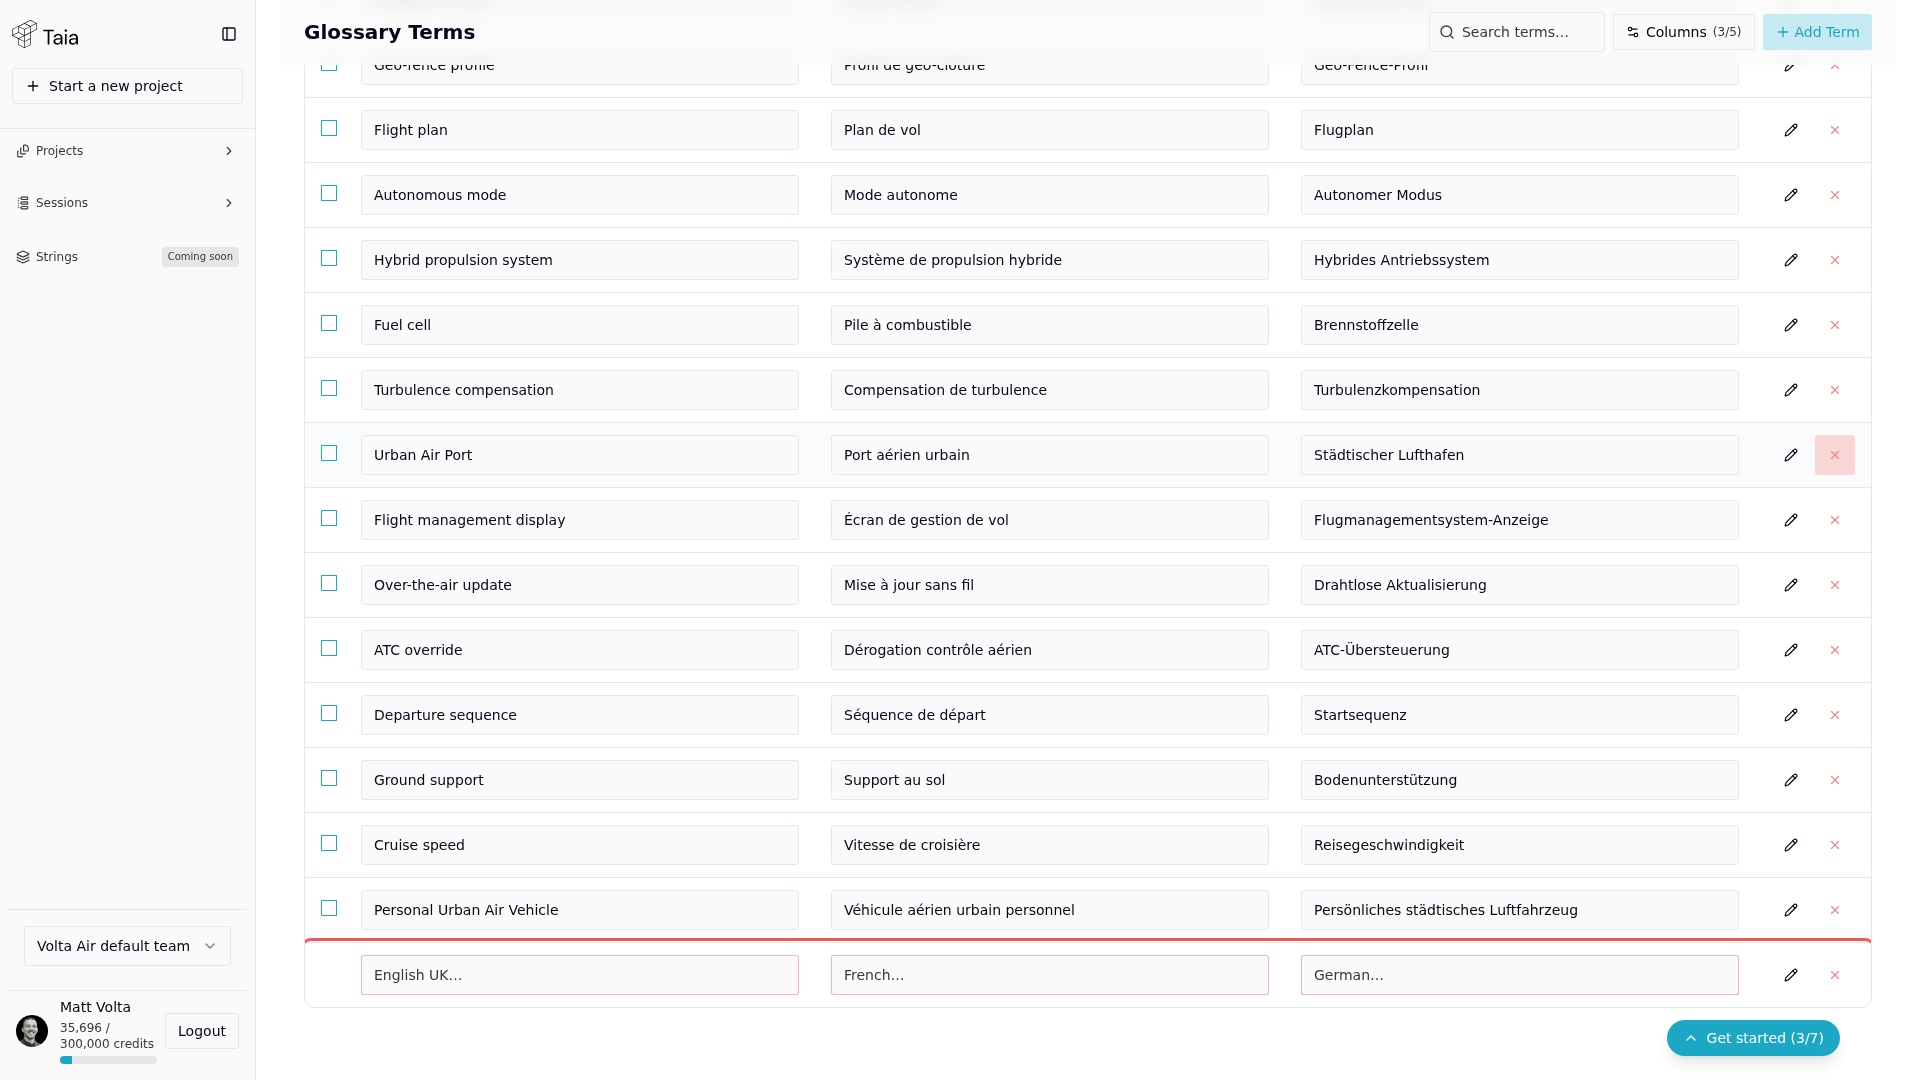
Repeat for each term you want to enforce. You can also import terms in bulk.
Tips
- Keep glossaries language-pair specific. A single glossary can have multiple target languages, but mixing source languages in one glossary usually creates confusion.
- Term matching is case-insensitive by default.
- You can add a definition or context note to each term to help linguists and the AI understand when to apply it.