Edit segments and accept suggestions
The CAT editor (Computer-Assisted Translation editor) shows your file broken into sentence-level segments. Each segment has a source text on the left and an editable target text on the right. This guide explains how to translate segments, insert AI suggestions, and confirm your work.
New to the editor? The tour of the translation editor shows what every part of the screen does.
Prerequisites
- You have a project with an AI translation completed, or a translation task assigned to you.
- Open the editor with whichever button applies to you:
- Preview on a job row — read-only, for managers checking a translation.
- Start Editing (or Continue Editing) on your task row, once you have accepted the assignment.
- Open Translation Editor on the assignment page itself.
The editing workflow
1. Select a segment
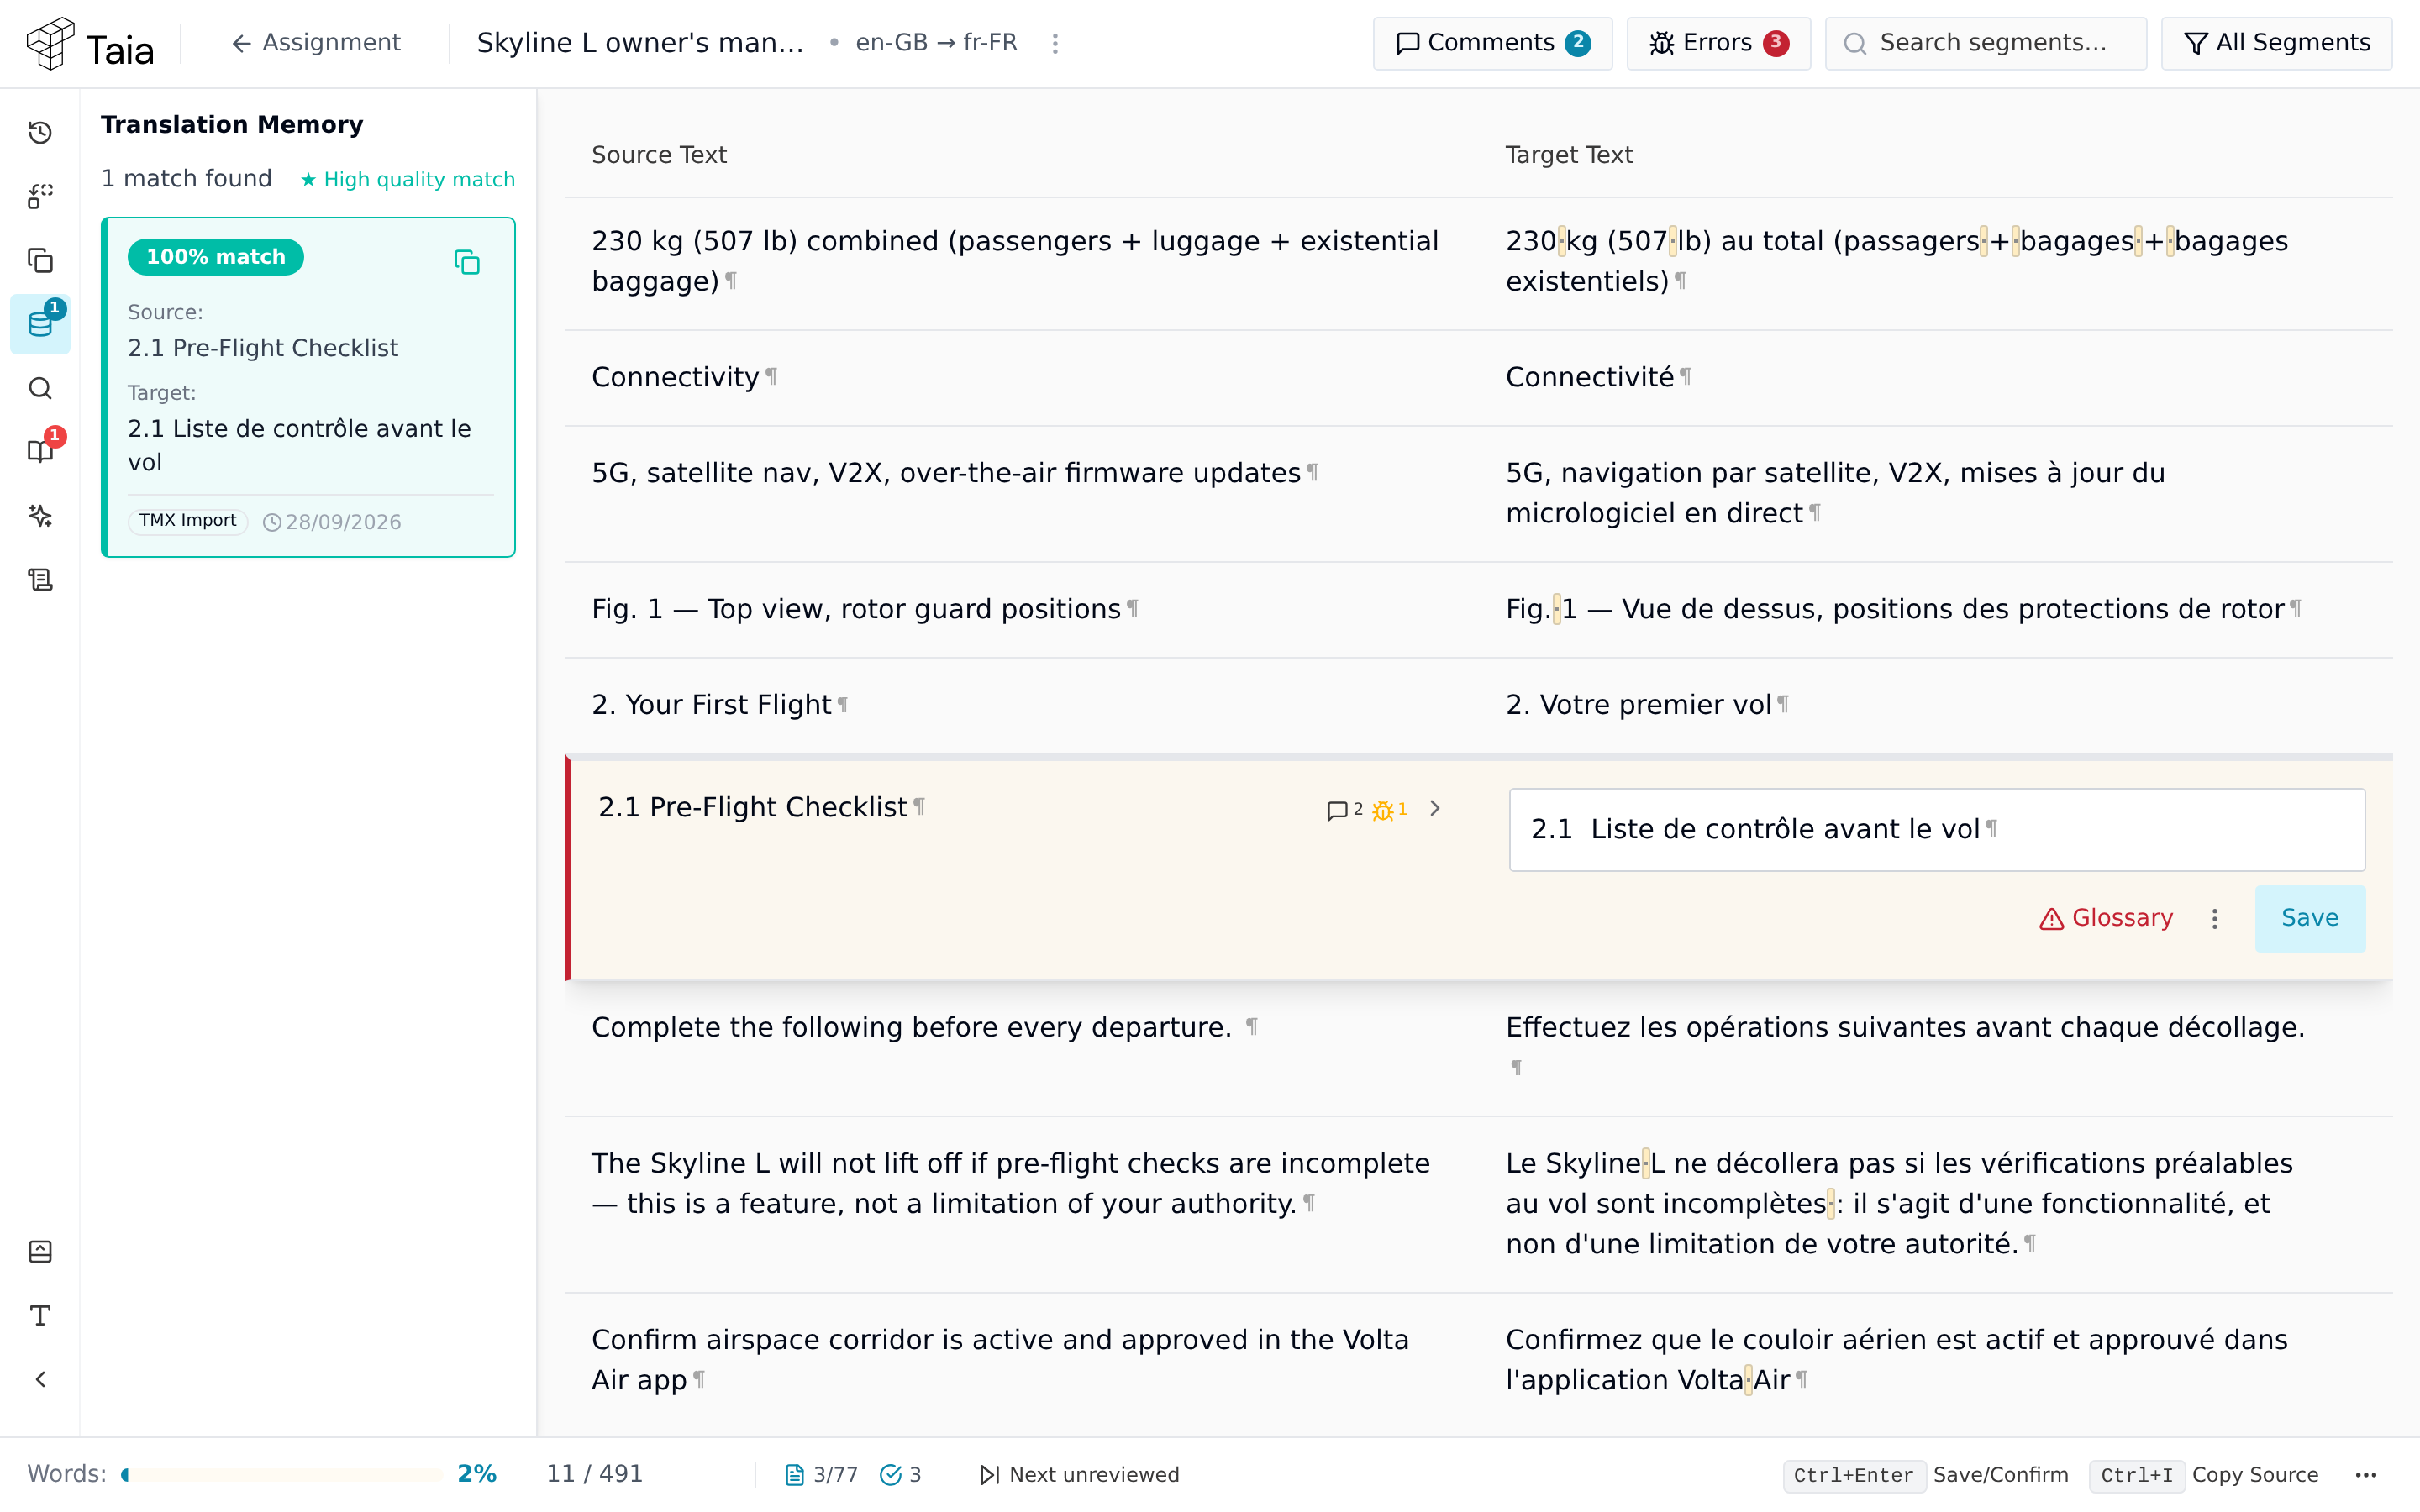
Click any row in the segment table to select it. The selected segment expands to show the full source text and a text editor for the target.
2. Edit the target text
Click in the target text area and type your translation. The editor preserves inline formatting tags (bold, links, variables) — don't delete or move the grey tag markers.
Spaces, tabs and paragraph ends can be made visible while you work — useful for catching a double space or a missing trailing space. See Show formatting marks.
3. Accept an AI suggestion
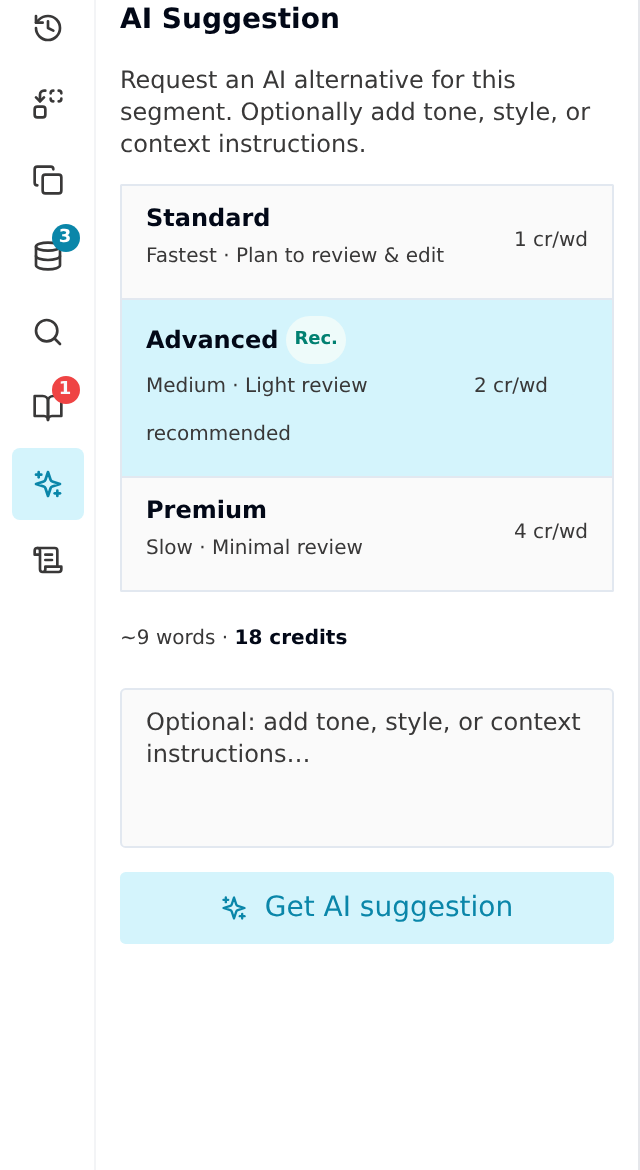
If the segment has already been AI-translated, the target field is pre-filled. Review it, make any edits, and move on. If you want a fresh suggestion, select the segment, then open the AI Suggestion panel (sparkle icon in the left icon rail) and click Get AI suggestion. A tier picker (Standard / Advanced / Premium) is shown — Advanced and Premium may be locked depending on your plan.
4. Save and move to the next segment
Press Ctrl+Enter to save the segment and jump to the next one. This is the most common action in the editor.
| Shortcut | Action |
|---|---|
| Ctrl+Enter | Save segment + move to next |
| Ctrl+Shift+Enter | Save segment, stay on current |
| Ctrl+↓ | Move to next segment without saving |
| Ctrl+↑ | Move to previous segment |
| Ctrl+U | Jump to the next segment you haven't saved |
Saving works whether or not you changed the text. A segment you leave exactly as the AI wrote it is still saved, as Confirmed.
5. Save every segment, including the good ones
Repeat for each segment, and save the ones you agree with as well as the ones you correct. The save is what records a segment as reviewed — reading it and moving on leaves no trace.
To find what you have missed, press Ctrl+U (or click Next unreviewed in the footer) to jump to the next segment you have neither edited nor confirmed. When there is nothing left, the editor says so.
Segment statuses
| Status | Meaning |
|---|---|
| Unedited | Original AI output, not yet reviewed |
| Edited | You changed the text and saved it |
| Confirmed | You saved it without changing it — approved as-is |
Both Edited and Confirmed count as reviewed, and both count toward the Progress percentage on the project page. Unedited counts as nothing. See what counts as a reviewed segment.
Locked segments
Some segments are locked. A lock icon appears next to the source text, the left edge of the row is greyed, and the target field is read-only, so saving is blocked until the lock comes off. Hover the icon to see why it's locked:
- Locked by administrator — a project manager locked it deliberately, usually because the wording is already signed off.
- Non-translatable — the file converter marked the content as something that shouldn't be translated, such as a code snippet or a product identifier.
Whether you can take a lock off depends on your assignment. An administrator can allow it per assignment, which means the same person may be able to unlock on one job and not on another.
If you're allowed to, open the ⋮ menu on the segment row and choose Unlock segment. The same menu then offers Lock segment if you want to put it back. If the option isn't there, ask the project manager who assigned the work to either unlock the segment or grant you the permission.
Unlocking is available for both kinds of lock, non-translatable segments included. Translating something the converter excluded can break the layout of the delivered file, so only do it when you're sure the content really should be translated.