Create an API key
An API key lets your own software talk to the Taia API: upload files, start translations and fetch the results without opening the website. There are two kinds:
- A team key belongs to a team, so anything it does is billed to that team's billing account.
- A personal key belongs to you. If you aren't part of an organization or team, this is the kind you create, and it is billed to your own plan.
Prerequisites
- Your plan includes API access (Pro). On plans without it, the Manage Your API Keys card doesn't appear on your Profile page. See the subscription plans matrix.
- For a team key, you are an organization manager or a manager of the team the key is for. Other members don't see the API keys tab and can't create keys for a team. Without any organization or team role, you can create a personal key. Organization members can't create personal keys, even if the page offers one: ask a manager for a team key instead.
You can create a key in two places. The steps are the same in spirit, but the screens differ.
From your profile
-
Click your name at the bottom of the sidebar to open your Profile.
-
On the Manage Your API Keys card, click Manage API Keys.
-
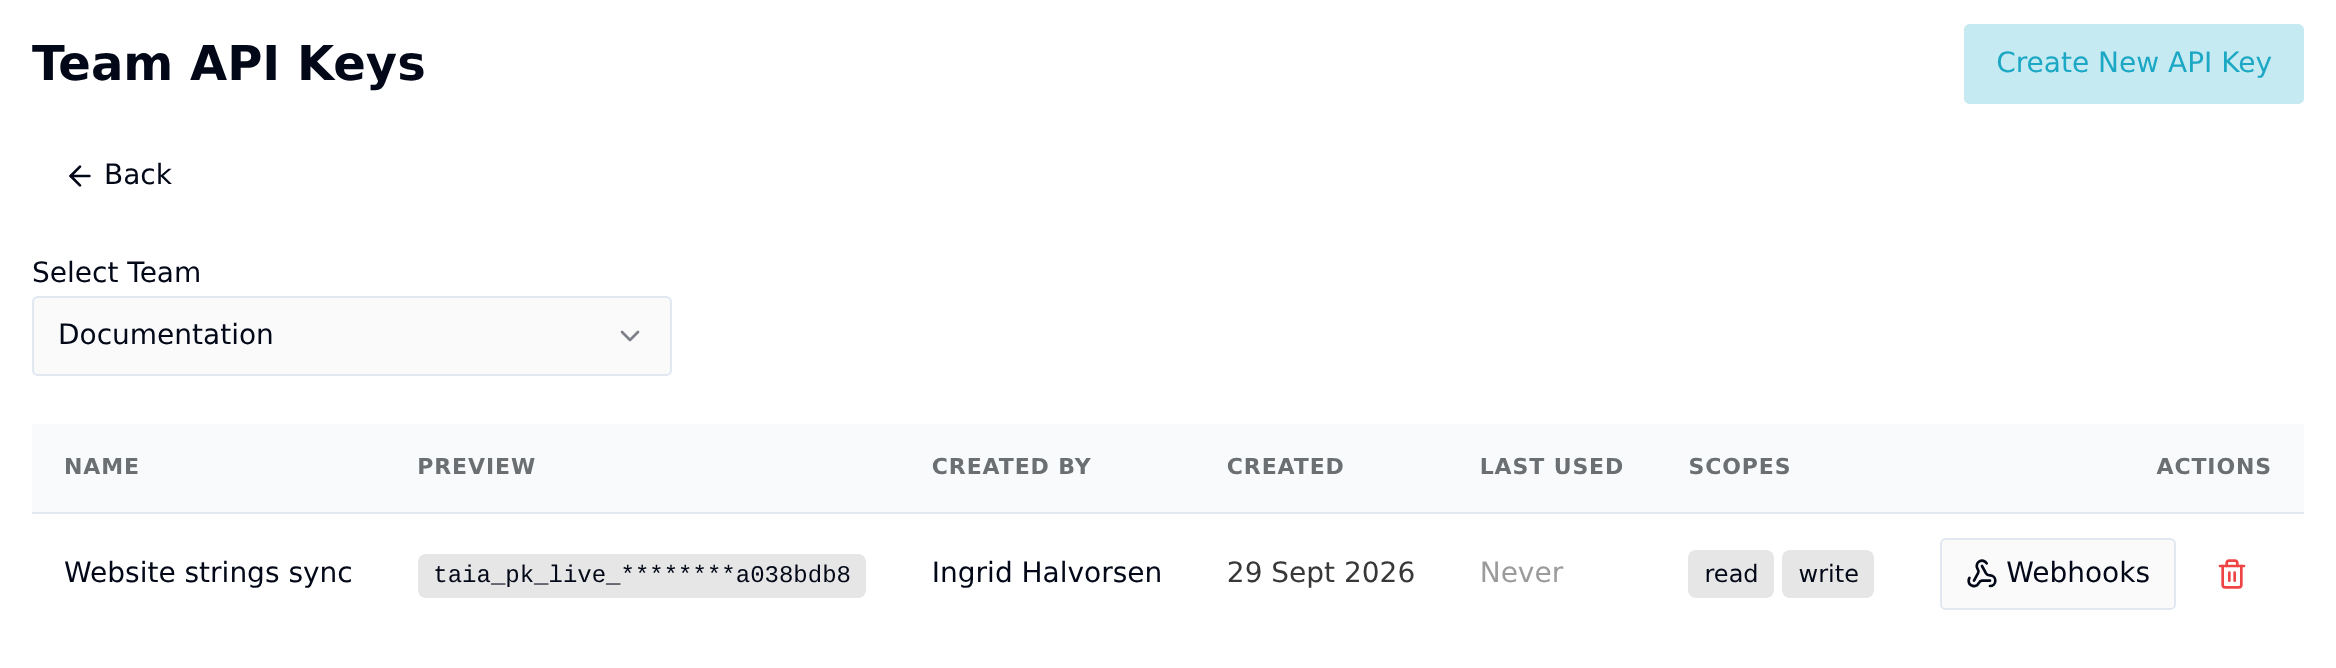
The page is titled Personal API Keys if you aren't on a team, or Team API Keys if you are. If you belong to more than one team, use Select Team to choose whose keys you are looking at.
-
Click Create New API Key. If you are on a team, the dialog has a Team field: choose the team the key will belong to. If you aren't, the dialog is titled Create Personal API Key and has no team field, because the key is yours.
-
Continue with Name the key and choose scopes.
From the organization page
Organization managers, and managers of a team, can also create keys where they manage the organization.
-
Open Manage Organization and go to the API keys tab. It shows one card per team you can manage.
-
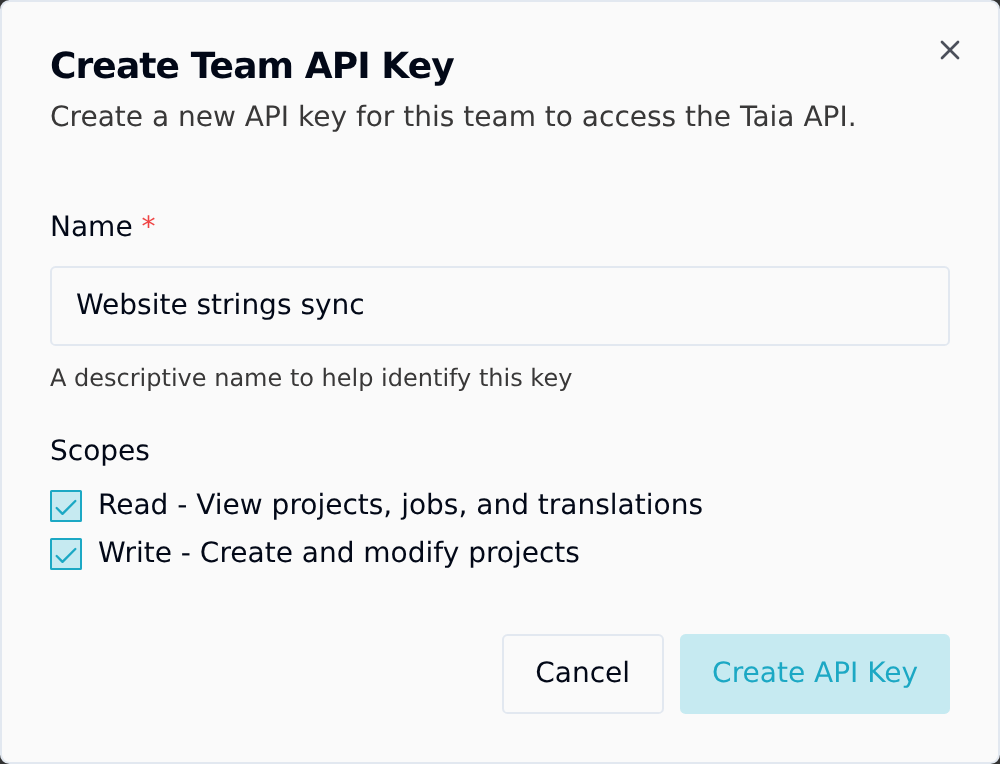
On the team's card, click Create API Key. The dialog is for that team, so it has no team field.
-
Continue with the next section.
Name the key and choose scopes
-
Give the key a name that says what it is for, for example the system that will use it. You can't rename it later.
-
Choose the scopes:
- Read is meant for viewing projects, jobs and translations.
- Write is meant for creating and modifying projects.
Both are ticked by default. The scopes are saved with the key, but the API doesn't check them yet, so every key can read and write whatever you tick.
-
Click Create API Key.
-
Copy the key that appears and store it in your password manager or your integration's secret store, then click Done.
Taia keeps only a hash of the key, so it can't show it again. If you lose it, revoke it and create a new one.
What the key list shows
After you click Done, the key appears in the list with its name, a masked preview (only the last eight characters are visible), when it was created, when it was last used and its scopes. Team lists also show who created each key, as in the screenshot in From your profile.
Last Used reads Never until the first request arrives, which makes it a quick way to confirm an integration is really using the key.
Use the key
Send it in the Authorization header of each request, as Authorization: Api-Key <your key>. The endpoints are described in the API reference.
Revoke a key
Click the red bin icon on the key's row and confirm. Revoking can't be undone, and anything still using the key stops working straight away. Create a replacement first if you need to rotate a key without a gap.