Attach a glossary to a project
Attaching a glossary to a project tells Taia's AI to enforce your terminology during translation. You can attach a glossary when creating a new project.
Prerequisites
- A glossary already exists. Don't have one? Create a glossary first.
- Your plan includes the glossary feature (Pro and Enterprise plans).
Steps
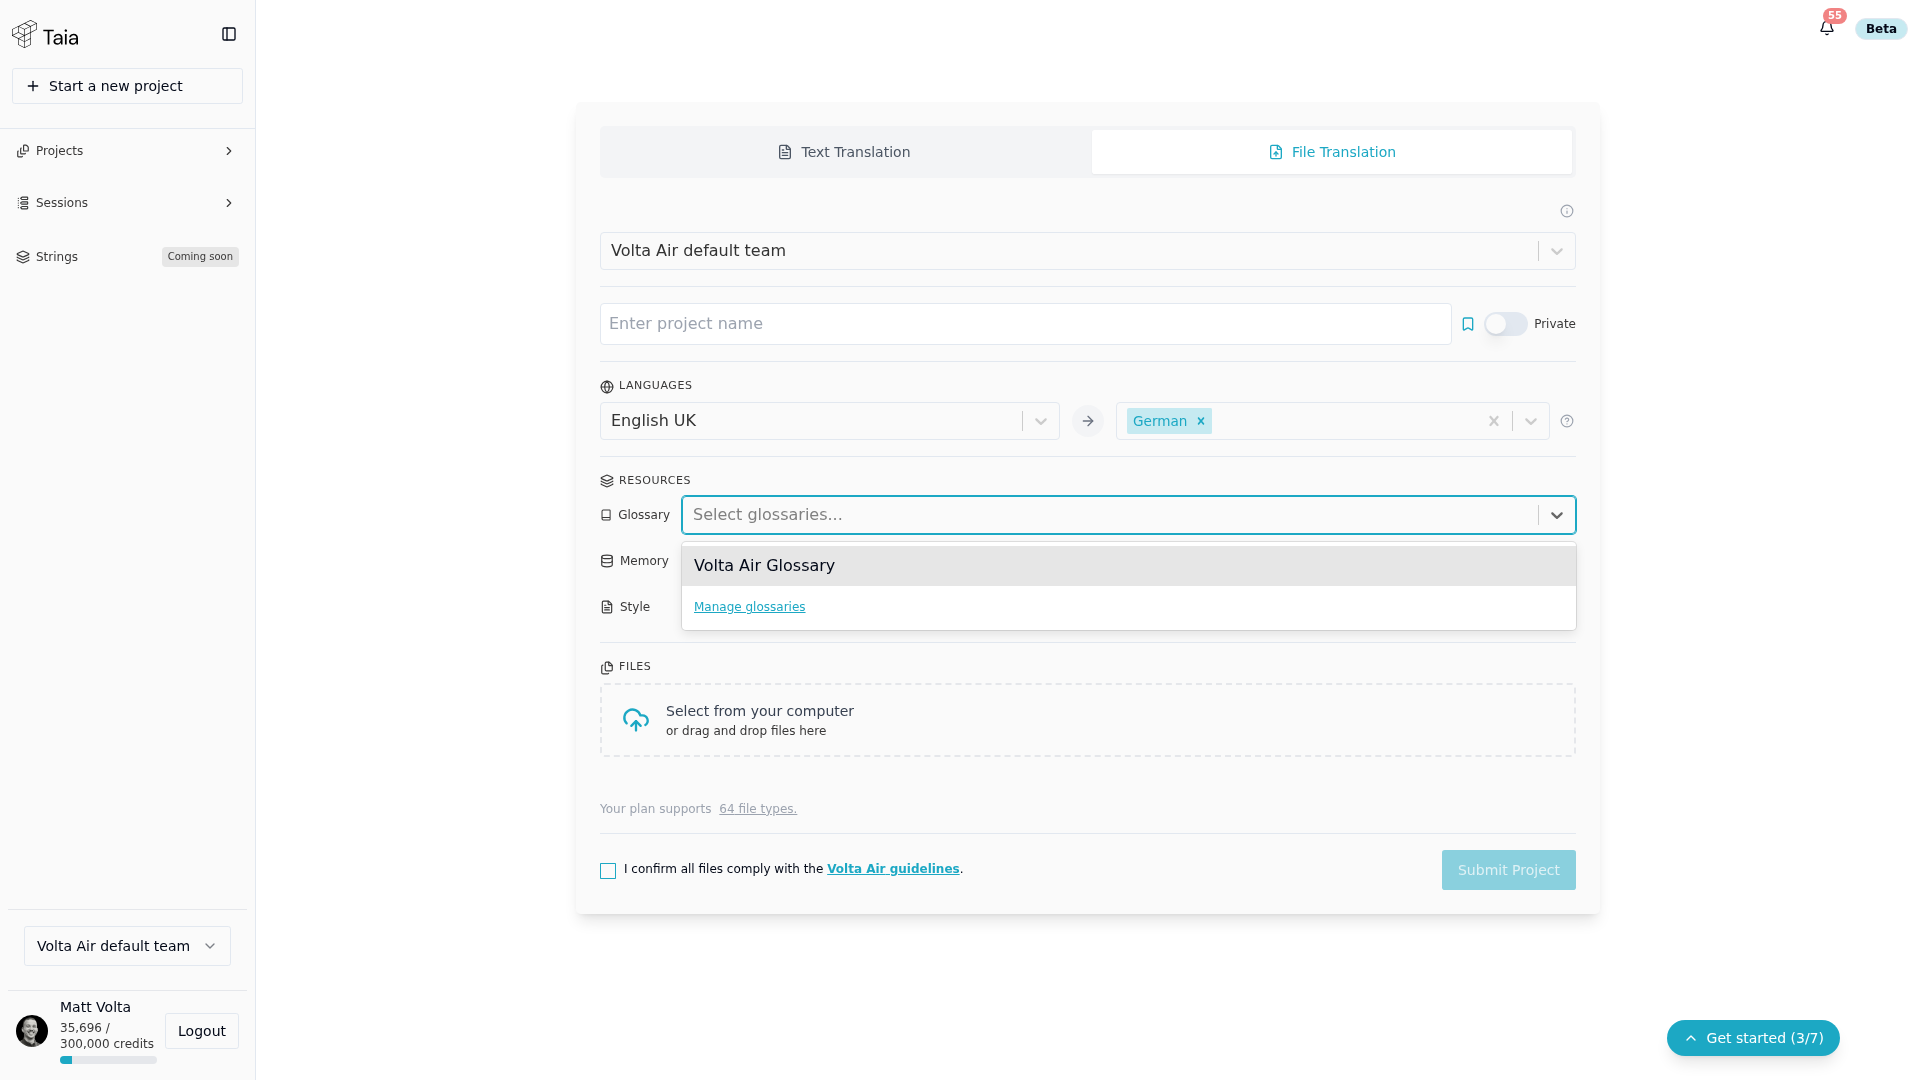
- On the Home page, upload your file and set the source and target languages.
- The Glossary dropdown appears below the language selectors.
- Select one or more glossaries. Only glossaries matching your language pair are shown.
- Click Submit Project to proceed.
During AI translation
Once the project is translated, the attached glossaries apply automatically. In the CAT editor:
- Glossary terms are highlighted in the source text with a blue underline.
- The Glossary sidebar panel shows detected terms and their required translations.
- A warning badge appears on segments where glossary terms were not applied correctly.
See Apply glossary terms in the CAT editor for details.
Project templates
If you regularly use the same glossary and language combination, save your settings as a template. On the Home page, click the bookmark icon next to the project name field, then Save current setup as template. See Save project settings as a template.