
Getting Started with Organizations and Teams
Taia's new Collaboration & Teams feature set allows professional users to collaborate on translation projects at scale. Whether you’re part of a small startup or a multilingual marketing team, you can now create organizations, set up teams, assign roles, and manage projects and subscriptions efficiently — all without per-seat pricing.
Who can use this?
Only users on the Pro Plan (€39/month) can access organization and team features. These features include:
- Unlimited team members
- Shared subscription quota (100,000 words/month)
- Shared access to 65+ file types and 189 languages
- Shared translation memory, glossary, and API access
- Built-in CAT (translation editor) with collaborative task workflows
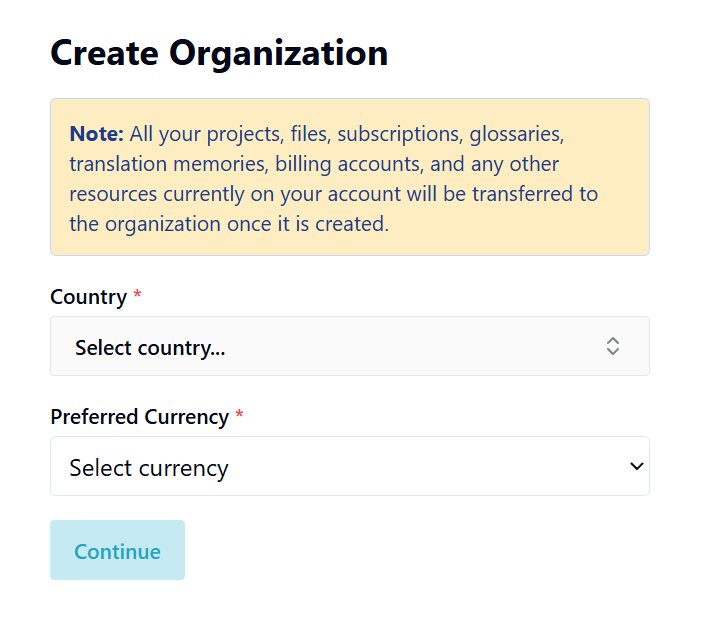
Step 1: Creating an Organization
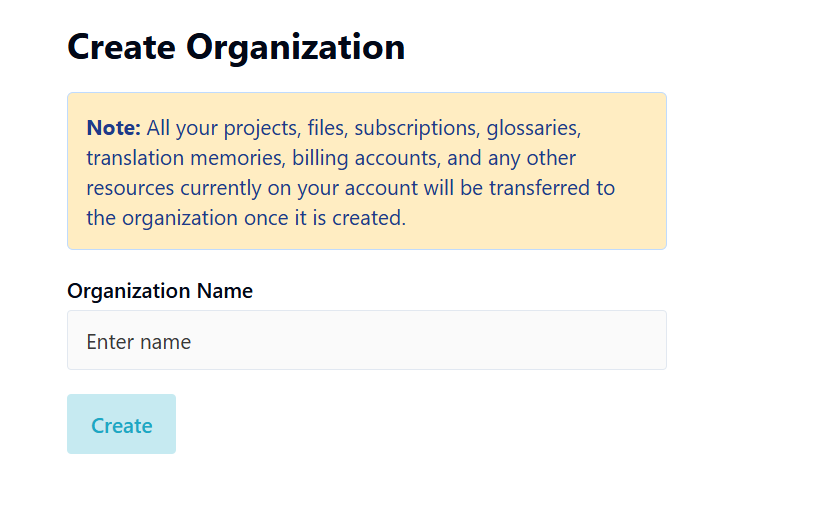
- Navigate to your Profile Dashboard.
- Click Create Organization.
- Enter your Organization Name.
- Select your Country and Preferred Currency.
Once created, a default team and a default billing account are set up automatically.
Step 2: Managing Your Organization
After setup, you'll see the Manage Organization panel. As the Organization Manager, you can:
- Create, edit, or remove teams
- Invite new users
- Assign roles
- Manage billing accounts and subscriptions
- Upload and enforce organization guidelines
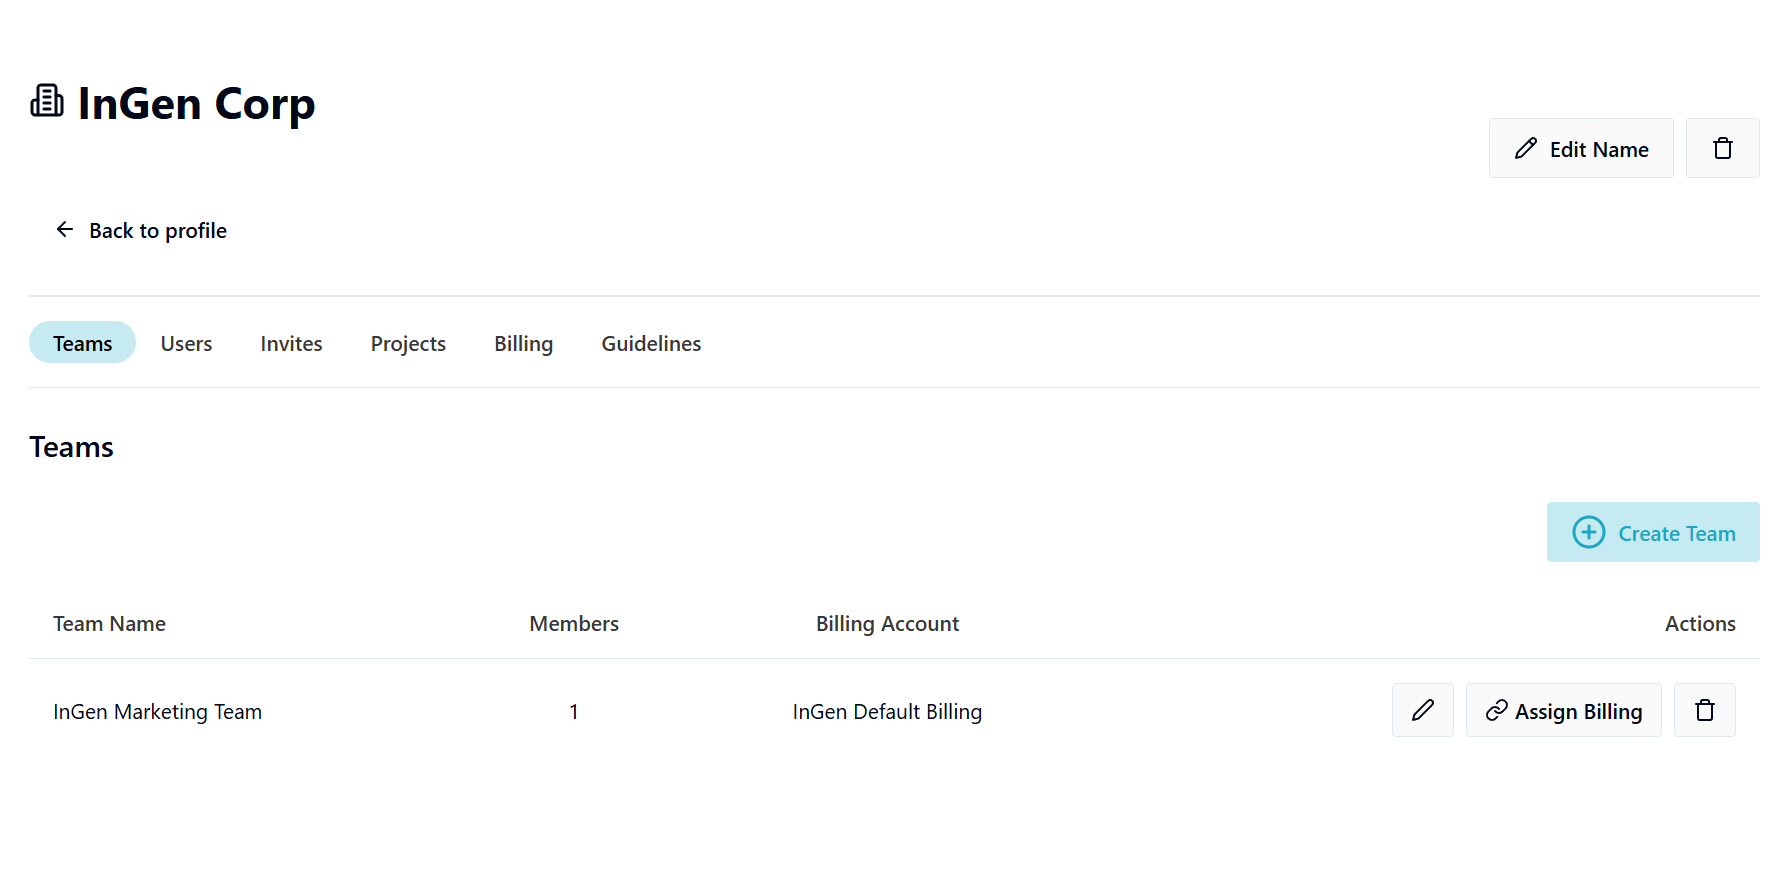
Tabs available inside your organization screen:
- Teams – group users around departments or projects
- Users – list and manage user roles
- Invites – track and send invitations
- Projects – view all projects by any team
- Billing – manage shared or team-specific billing accounts
- Guidelines – define project compliance rules (e.g., style guides)
Step 3: Creating and Managing Teams
Teams are the core unit of collaboration. From the Teams tab:
- Click Create Team to define a new team.
- Assign a billing account to each team.
- Edit or remove teams at any time.
Team members can:
- Create and manage projects
- Use the CAT tool to edit translations
- Submit jobs for professional review
Team managers (role-specific) can also:
- Invite/remove team members
- Assign tasks
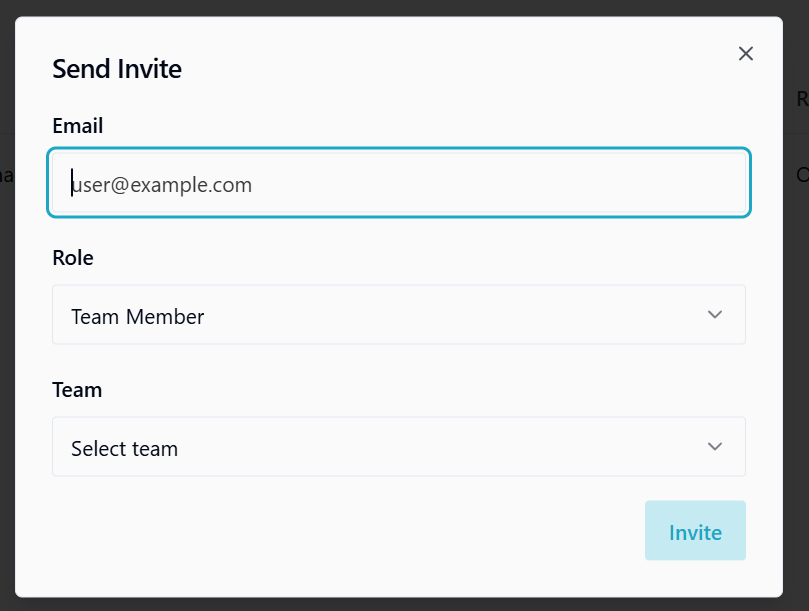
Step 4: Inviting Users
-
Go to the Invites tab.
-
Click Send Invite.
-
Enter the user’s email.
-
Select their role:
- Organization Manager
- Billing Manager
- Team Manager
- Team Member
-
Assign them to a team.
📧 Invited users will receive an email. If they already have a Taia account, they’ll be prompted to accept and merge their resources into the organization. If not, they’ll be asked to create a new account.
Step 5: Assigning Roles & Permissions
| Role | Scope | Permissions |
|---|---|---|
| Organization Manager | Global | Full access to all settings, projects, users, billing, and teams |
| Billing Manager | Org-level | Can view/edit billing info and manage subscriptions |
| Team Manager | Team-level | Manage team members and invite new users to their team |
| Team Member | Team-level | View/create/edit projects, use CAT tool |
Users cannot belong to multiple organizations, but can be part of multiple teams within one organization.
Step 6: Managing Billing Accounts & Subscriptions
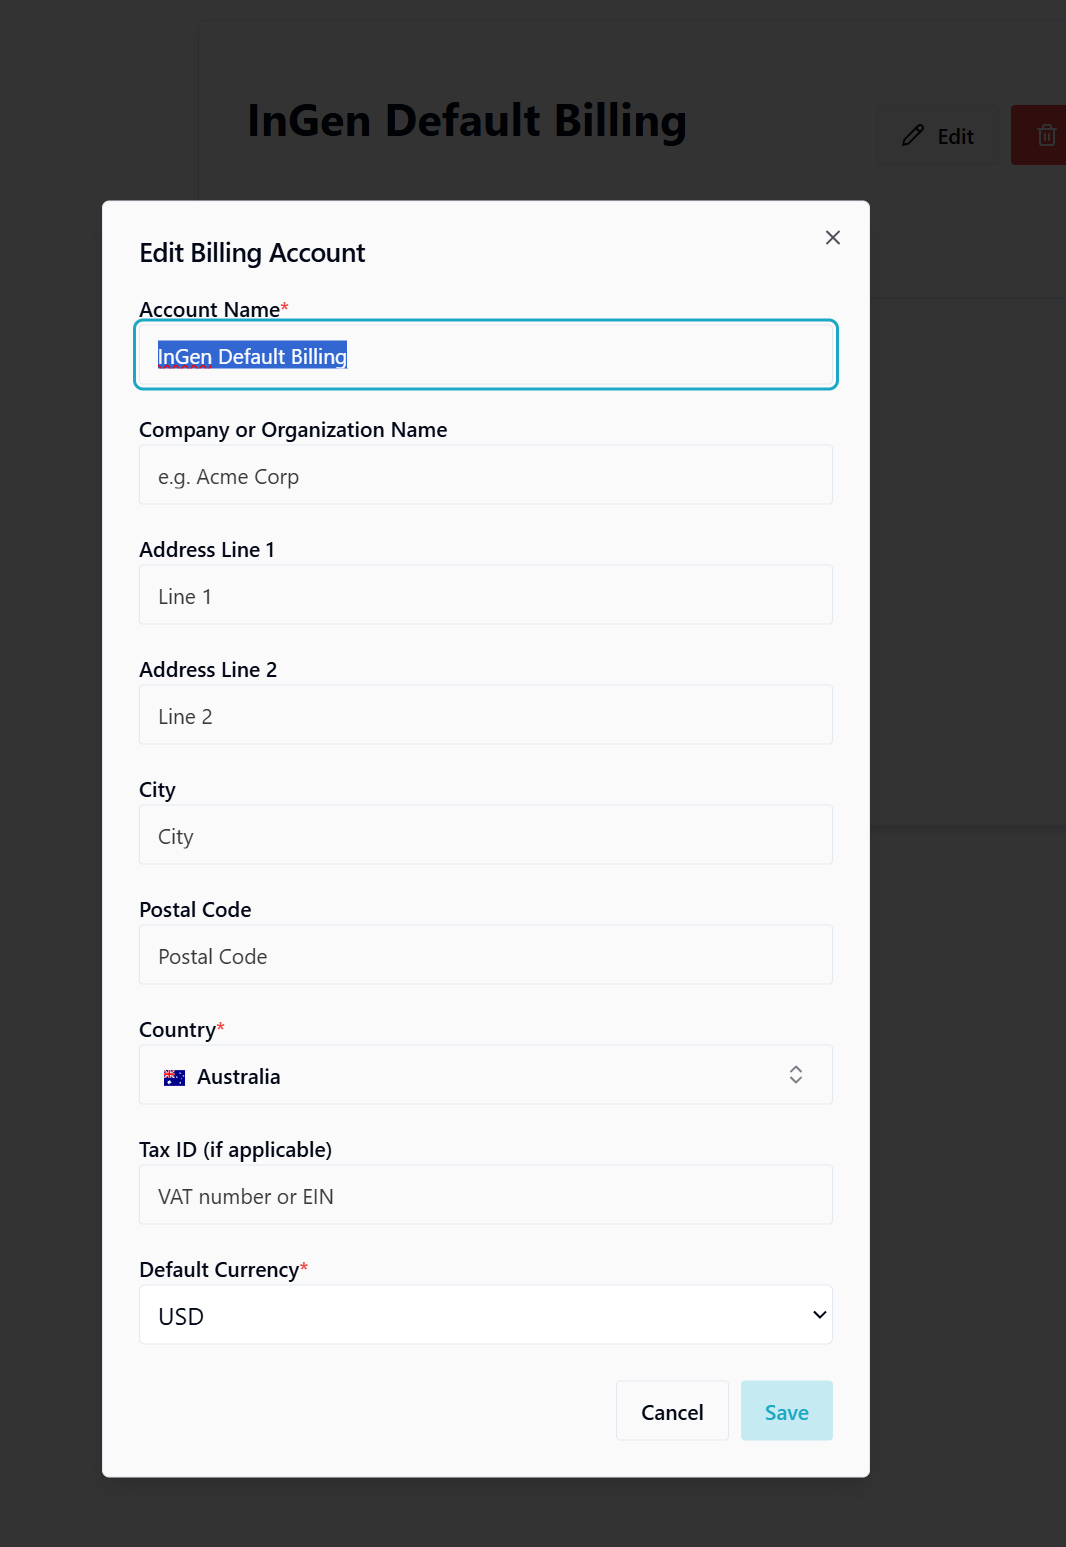
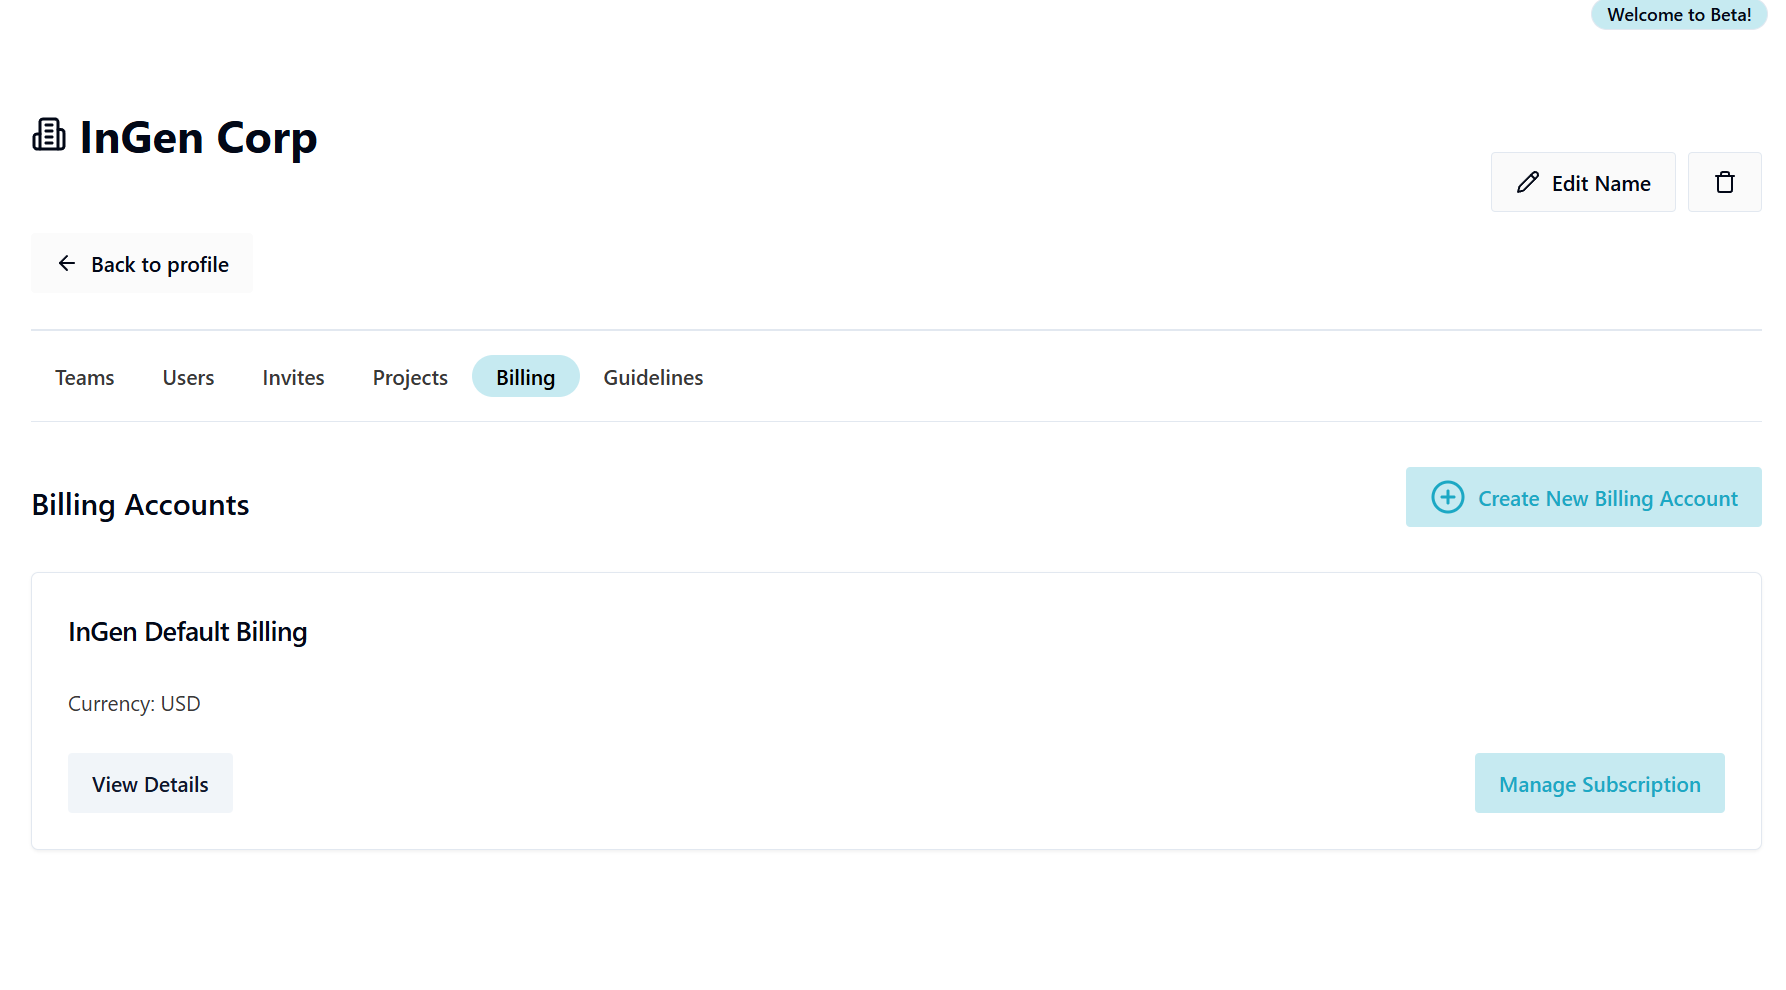
Billing is decoupled from users. It’s linked to billing accounts, which can be shared by one or many teams.
- Go to the Billing tab
- Create or edit Billing Accounts (organization name, tax ID, currency)
- Assign billing accounts to teams as needed
- Click Manage Subscription to be taken to the Stripe customer portal
Step 7: Creating Projects in a Team Context
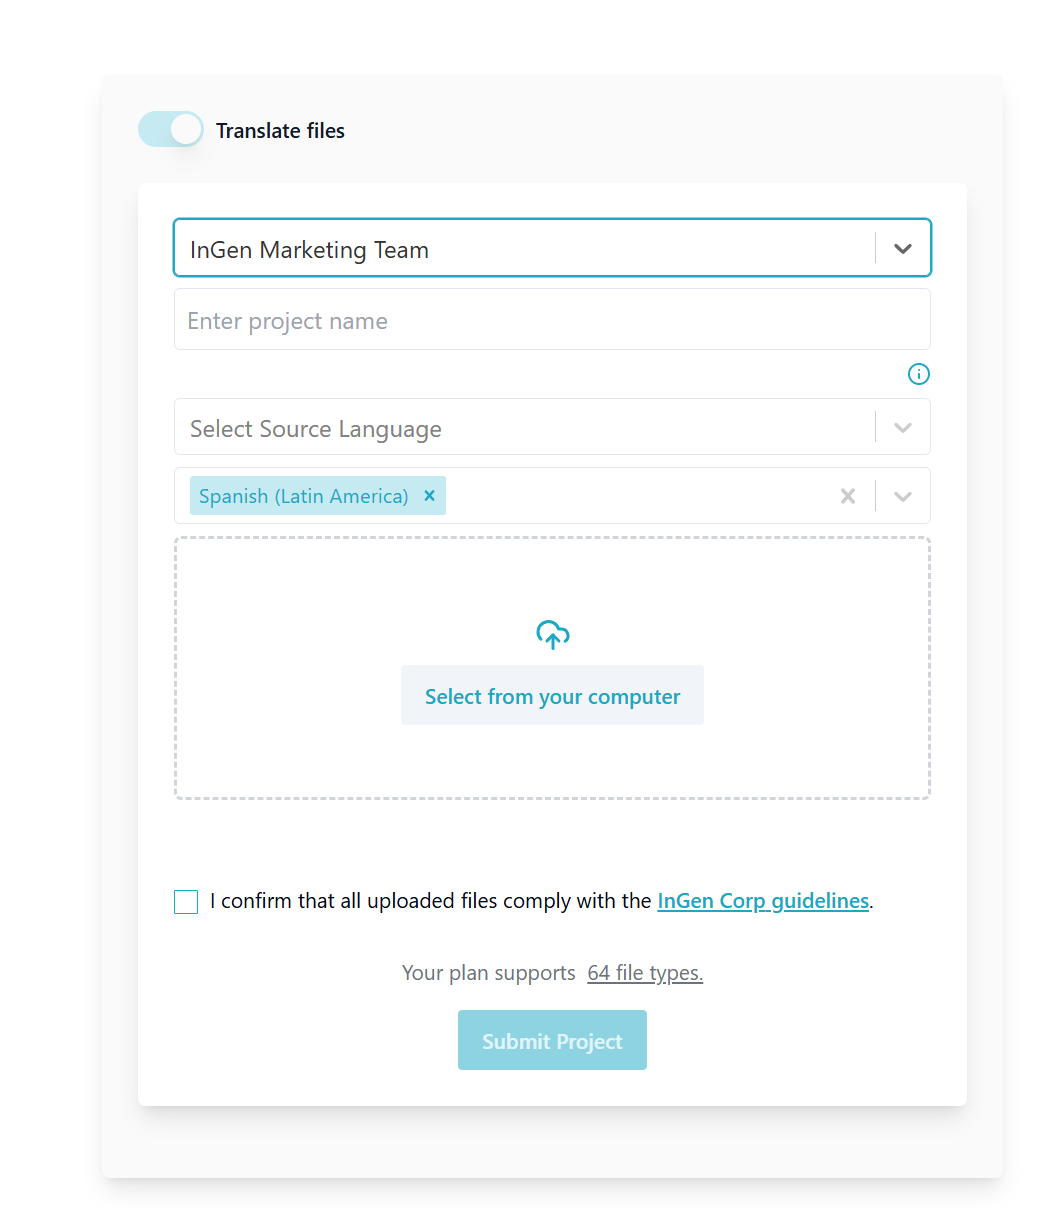
When starting a project:
- Select the team to which the project will belong.
- Choose source/target languages, and upload your files.
- Accept the organization guidelines (if enabled).
📌 Note: Projects cannot be moved between teams after creation.
You can view all organization-wide projects from the Projects tab.
Step 8: Enabling Organization Guidelines
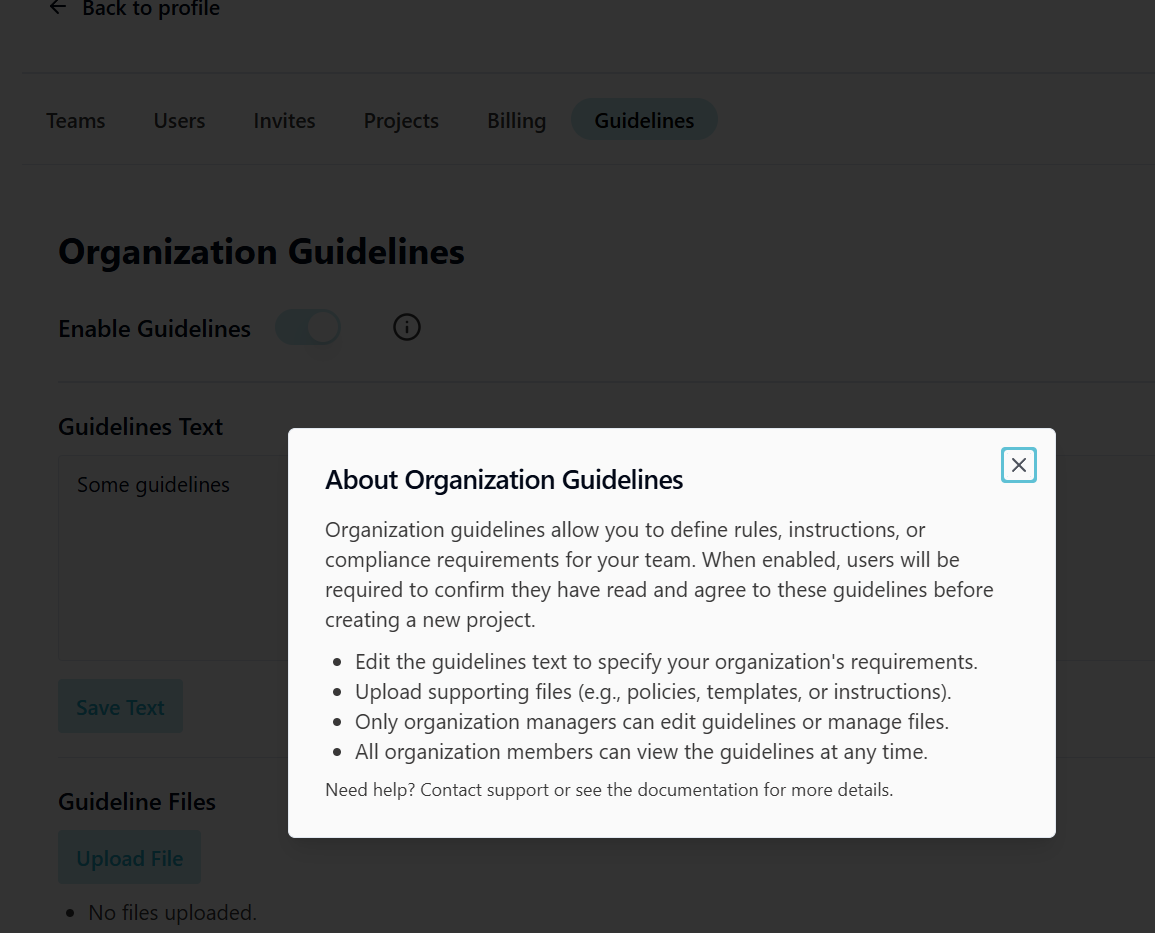
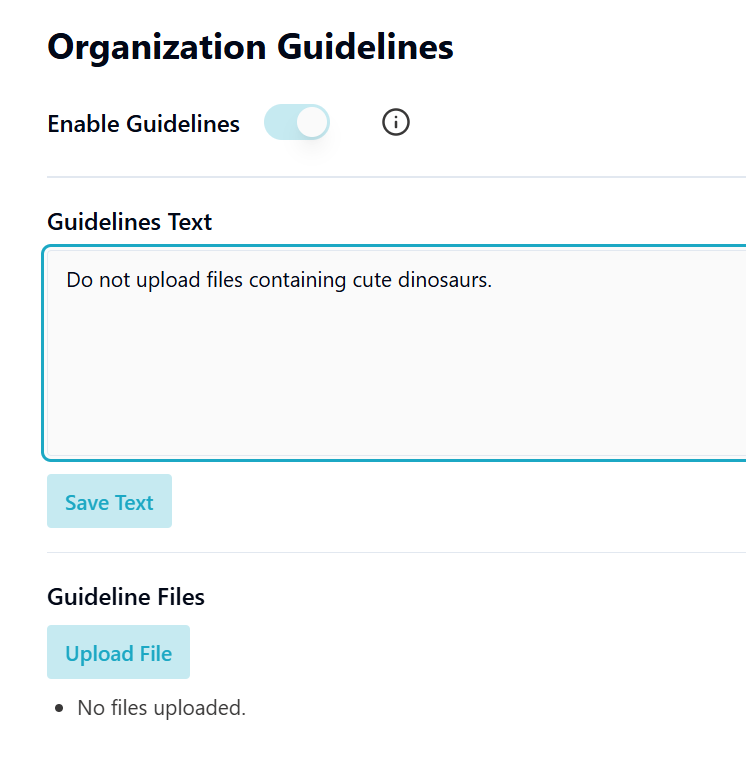
Organization Managers can enforce rules before allowing users to create projects:
- Enable the Guidelines toggle
- Add text instructions (e.g., "Do not upload files containing cute dinosaurs.")
- Upload supporting documents (PDF, DOCX, etc.)
Users must confirm compliance before submitting a project.
Step 9: Switching Between Teams
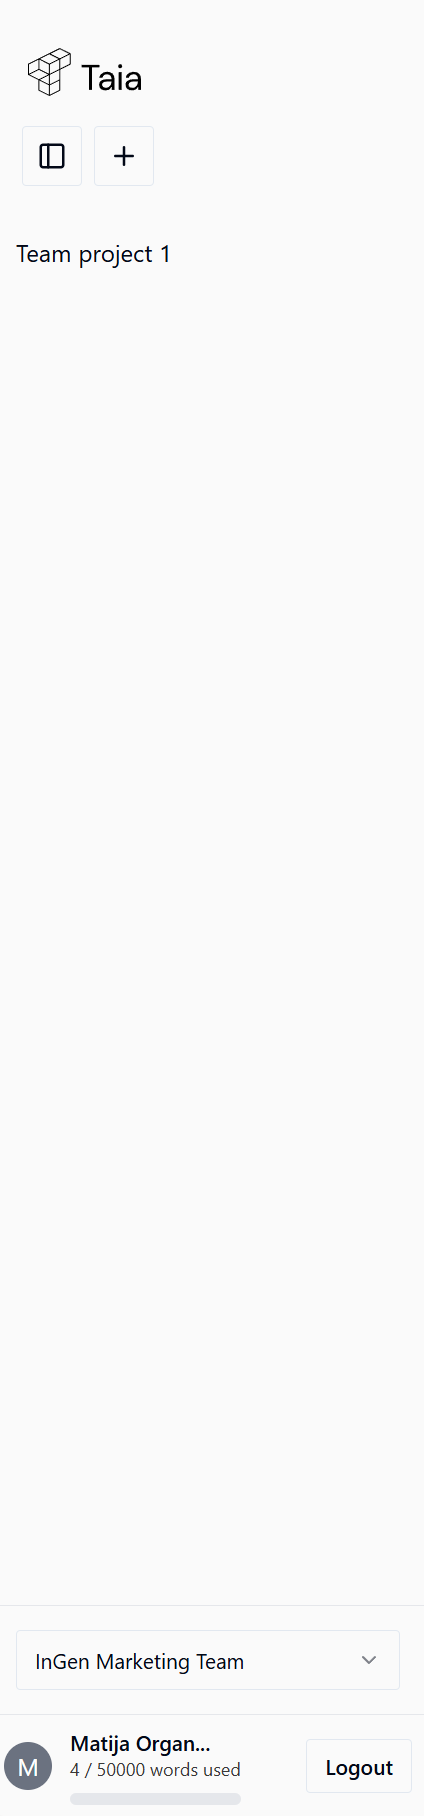
If you're part of multiple teams, use the dropdown in the left sidebar to:
- Switch current team context
- View projects for that team
- Start new projects under the selected team
Related Features (Covered in Other Articles)
For any questions, contact support or browse more topics at help.taia.io